
Choosing among Eyelash Extension Kits can feel simple until you compare the labels, tools, and instructions. One box may include tweezers, lash fibers, adhesive, and remover; another may leave out items you expected. Small details matter. A clearly printed ingredient list, sealed packaging, and readable instructions are more useful than glossy photos or dramatic claims. If product information is missing, that is a reason to pause.
This guide explores ten practical points to consider before buying, from lash variety and tool quality to storage and beginner-friendly directions. It also looks at adhesive details, because a kit should explain how to use and store its products—not suggest that every formula suits every person. Follow the manufacturer’s directions, keep products away from direct contact with the eyes, and do not use items with damaged packaging or unclear dates. Irritation is not something to push through; stop using the product and seek appropriate professional advice if symptoms continue.
It is easy to assume that a higher price means a better kit. That assumption deserves a second look. Compare what is actually included, how clearly the brand describes it, and whether the components fit your needs and experience. No kit can replace careful handling or sound hygiene. Some details may still be hard to judge from a product page, so a little skepticism is useful. The right choice is not necessarily the biggest set; it is the one you can understand, inspect, and use responsibly.
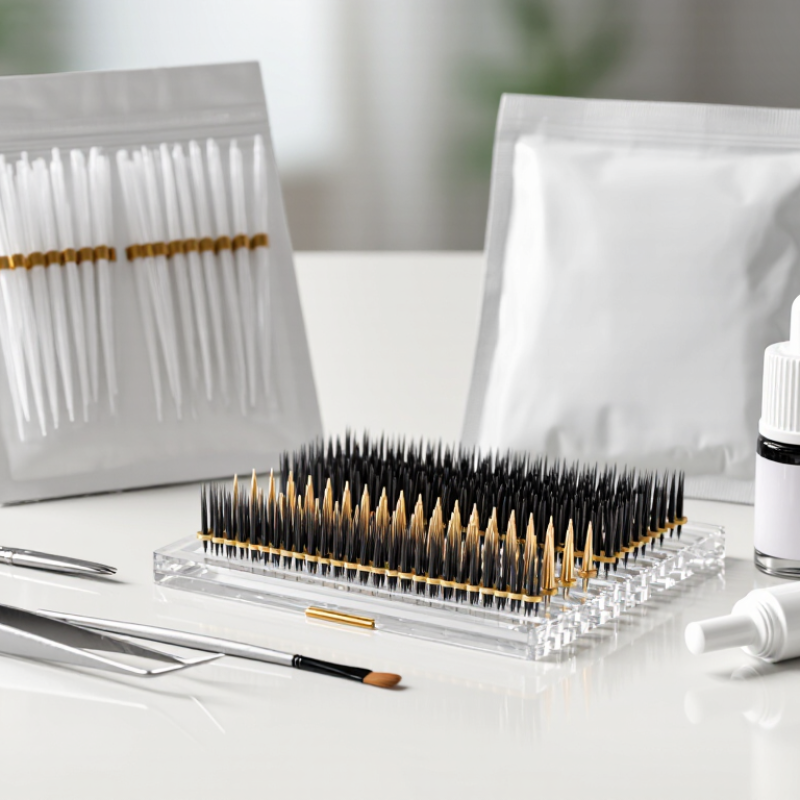
Choose a kit that matches the lash look you can create steadily, not just the most dramatic photo. Classic kits use one extension on each suitable natural lash, so they’re often easier to learn with and help you practise isolation. Check that the kit includes tweezers with a comfortable grip, a practice mannequin or lashes, and clear instructions. Keep it simple.
Hybrid kits combine classic extensions with volume fans for a textured, fuller look. They require more decisions about placement and balance, so make sure the instructions explain lash mapping and fan handling. Volume kits use lightweight fans, but their application calls for precise control and appropriate training. A large number of lashes in a kit does not make the technique beginner-friendly.
Look closely at the skill guidance before buying. A kit labelled “beginner” may still assume steady hands and familiarity with adhesive timing. It is easy to overestimate readiness after practising on a mannequin; working near someone’s eyes demands extra care. Follow the product instructions, avoid applying extensions to irritated eyes, and seek qualified guidance if you are unsure. Also check whether essentials, such as adhesive or remover, are included and suitable for your intended use.
Choosing between classic and volume fibers starts with diameter, not the curl printed on the tray. Classic extensions commonly list 0.10–0.20 mm fibers, equal to 100–200 microns. Volume fibers often list 0.03–0.07 mm, or 30–70 microns, allowing multiple fine fibers in a fan. These are product specifications, not universal safety limits. ISO 22716:2007 addresses cosmetic manufacturing practices; it does not set eyelash-extension diameter classes.
Tip: Match fiber weight to the natural lash. Check the tray label, then inspect a few fibers under magnification. A 0.15 mm classic fiber may feel very different from a fan made with several 0.05 mm fibers. Diameter alone does not tell you the fan’s total weight. I still find kit labels easy to misread.
For a careful comparison, record diameter, fiber count per fan, and the natural lash condition before selecting a style. Do not assume the smallest fiber is automatically suitable; application technique and adhesive placement matter too. The U.S. National Institute of Standards and Technology explains that measurement results depend on defined methods and units, so compare kits using the same units and labeling basis. If a kit omits diameter or gives unclear fan details, ask the supplier before use.
Professional lash trays often span 6–18 mm, but the longest fibers are not automatically the best choice. Start by comparing extensions with the client’s natural lashes: their length, thickness, direction, and curl all matter. A 6 mm fiber may suit a short inner corner, while a longer option may create a subtle lift farther out. Small changes show.
Curl should complement the natural lash rather than fight it. If natural lashes point downward, a stronger curl can create visible lift, but a dramatic curve may look uneven beside straighter fibers. Lay a few sample lengths beside the lashes before mapping the set. Check the shape from the front and side; a mirror can reveal gaps that are easy to miss up close.
Use the client’s natural lash strength as a practical limit. Heavy or overly long extensions may strain delicate lashes, so a lighter, shorter selection can be the better fit. This is not an exact formula: natural growth patterns vary, and matching every lash perfectly takes judgment. When irritation, unusual shedding, or sensitivity is present, pause application and seek guidance from a qualified lash professional. Proper isolation and clean tools matter as much as choosing the right millimeter.
| Tip | What to Check | Practical Guidance | Useful Reference |
|---|---|---|---|
| 1. Match extension length to natural lashes | Natural lash length and strength | Choose extensions that the natural lashes can support comfortably; avoid selecting length based only on the desired dramatic effect. | Many professional trays include lengths around 6–18 mm, though available sizes vary. |
| 2. Use length bands as a starting point | The look and placement you want | Shorter lengths can suit inner-corner work; medium lengths are commonly used through the central lash line; longer lengths can add emphasis where natural lashes are strong. | Typical tray groupings include 6–8, 9–10, 11–12, 13–14, and 15–18 mm. |
| 3. Pick a curl that suits the natural lash direction | Natural lash angle and desired lift | A softer curl may blend with straighter-looking lashes, while a stronger curl creates more visible lift. Check the tray’s curl profile before buying. | J, B, C, CC, D, and L are common curl labels; their exact shape can differ between suppliers. |
| 4. Consider lash diameter and weight | Natural lash condition and extension technique | A lighter extension is generally important for fine or weaker natural lashes. Choose diameter according to appropriate training and the intended classic or volume application. | Common diameter listings range from about 0.03 to 0.20 mm; suitable choices depend on technique and lash health. |
| 5. Look for a mixed-length tray | Range of sizes in one case | Mixed trays offer several lengths for mapping different zones and accommodating natural variation across the lash line. | Check the listed lengths and how many rows of each size are included. |
| 6. Plan the lash map for each eye | Eye shape, spacing, and natural growth pattern | Varying lengths by zone can create different effects. A single pattern does not suit every eye, and a longer outer corner is not always the best choice. | Use a written or diagrammed map to keep placement deliberate and balanced. |
| 7. Match curl and length together | Overall appearance and comfort | A strong curl can appear more dramatic than a softer curl at the same length. Assess the combined effect rather than choosing length in isolation. | Compare the curl profile and length chart provided with the tray before ordering. |
| 8. Check the fiber and finish | Appearance, consistency, and handling | Review whether the fibers have a matte or glossy finish and whether the rows are easy to lift from the strip. Product descriptions should state the material clearly. | Compare specifications and inspect sample lashes when possible. |
| 9. Check what the kit includes | Tools, adhesive, and instructions | Confirm whether the kit contains tweezers, adhesive, remover, and application instructions. Products intended for trained use should be used according to their directions. | Check package contents, ingredient information, and any storage or use guidance. |
| 10. Prioritize safe application | Hygiene, sensitivity, and aftercare | Follow product directions, keep tools clean, and avoid getting adhesive in the eye. Stop use and seek appropriate advice if irritation occurs. | Professional application and patch testing according to product instructions can help reduce avoidable risks. |
Check Adhesive Cure Time and Recommended Humidity on the Product Label
Tip: Read the adhesive instructions before opening the kit. Cure time describes how long the adhesive needs to set under specified conditions. It may differ from the time it feels dry. Small details matter. Look for a recommended humidity range, and check whether the label also specifies room temperature. Do not guess. A room that feels comfortable may still fall outside the product’s stated range.
Tip: Use a simple room hygrometer to check humidity near your work area. Avoid placing it beside a heater, open window, or steamy sink, where readings can mislead. If conditions sit outside the label’s range, wait or adjust the space as directed. Rushing can affect how the adhesive performs. It is tempting to rely on habit, but different formulas may need different conditions. I would not assume a familiar cure time applies to every kit.
Before use, confirm the adhesive is within its stated shelf life and follow all handling and ventilation instructions. Keep the container closed between uses, and never add extra adhesive to compensate for slow setting. If the label is unclear, contact the seller or manufacturer for clarification rather than experimenting near the eyes. A careful label check takes little time. It can prevent avoidable guesswork during application.
A low price can hide important gaps. Check that the kit lists its adhesive ingredients, use instructions, and expiry date. Avoid products with unclear labeling or damaged, unsealed packaging. Adhesives can irritate eyes or skin, and a patch test cannot guarantee a reaction-free application. Follow the kit’s safety directions, keep adhesive away from the eye itself, and stop if burning or swelling occurs. When in doubt, ask a qualified lash professional.
Inspect the tools closely. Tweezers should meet evenly, without rough edges or loose joints; a misaligned tip can make precise placement harder. Look for clear cleaning guidance and enough disposable applicators for the number of uses promised. Check the fine print. A kit with many pieces may still lack essentials, while extra tools can sit unused in a drawer. I’ve found that attractive packaging is a poor substitute for a clear inventory.
Compare cost per application, not just the checkout price. Divide the total cost by the realistic number of complete applications, accounting for adhesive shelf life and single-use items. A cheaper kit may cost more over time if its glue expires before the lashes are used. Estimate conservatively. The advertised number of applications may assume careful storage and no spills, which is not always how real routines go. Keep the kit’s instructions and expiry details where you can find them.